DARTMOOR
Haytor
Haytor Quarry
Holwell Quarry
Holwell Tor
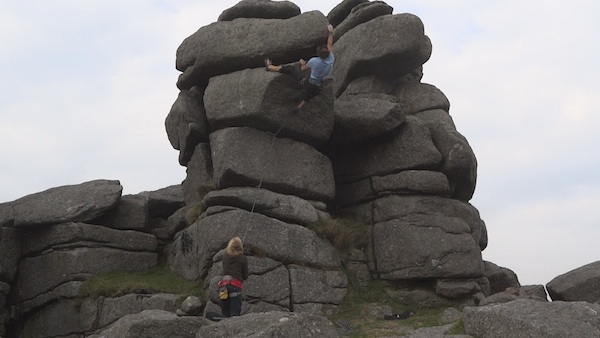
Hound Tor
Greator Rocks
Chinkwell Tor
Luckey Tor
Great Mis Tor
King's Tor
Foggintor Quarry
Swell Tor Quarry
Leedon Tor
Leather Tor
Irish Man's Wall
Haytor - Lowman
Posidrive E4 5c #
30ft. A worthwhile, bold route up the wall left of Screw. A bold and committing start leads to gear (small Friends) and less difficult climbing to the top. A couple of mats would take the sting out of the start. FA Martin Perry, Dave Henderson Summer 2009
Left Hand Thread E2 5b #
A meandering variation on Posidrive making the most of the available gear. From the left side of the grassy platform trend up left to a horizontal break (TR above). Step up and place a high micro-cam. Traverse 2m R past flakes to a break and surmount this via the large undercut flake on the right. Finish direct. FA Pete Saunders, Rik Meek, Brian Hannon 7/7/13
Haytor Quarry
Kaolin E6 6b
40ft Start from a grassy ledge on the R. Step up then L onto the steep slap at a thin horizontal break (crucial gear). Fingery moves lead up the thin seam above to gain the slanting half-height break. Make some bold moves to clip a peg up and L . A long stretch gains a thin break and one more reach leads to an easier top-out. FA Dave Henderson Autumn/Winter 1999.
Koala E4/5 35ft #
To the left of Kaolin is a crack, and left again is an unappealing wall with a bulge. Climb this with a small Friend. FA Simon Young 2000.
Lord of The Ho Garden VS 4c
Start 2 meters left of Kaolin in the crack up the middle of the wall. When you reach the half height break move left, along a small rail then mantel onto a ledge then finish up by trending right to the top along the crack that rises right. (the obvious line of weakness) FA Ben-Bravington Sim & James Latus 08/11/07
Ho Garden Direct E3 6a
Start as for Lord of The Ho Garden then when you get to half height where the break goes right then go straight up the blank wall. Bad holds hard crux bad gear + a potential ground fall FA James Latus 07/05/08
Straight No Chaser, the left arete of the Sandman Wall, has had several repeats. The grade seems to be settling at about V6/7. Most/all? repeats have used an improved sequence - the original followed the arete more directly. Note: Unfortunately this section of the quarry has been flooded making access to the routes a bit more problematic!
Holwell Quarry
Never Forget a Face 10m E5 6a (3.7.05) #
Unashamedly eliminate: scary and with the first gear at 7m. Boulder straight up the wall right of You May be the Face.....until very tenuous moves to stand up on a small foot-ledge enable a piece of gear to be placed blindly up to the right in a crack. Continue up a rib and swing right onto Something about Pluto to exit. FA: Martin Crocker (after top roping), John Harwood
Something about Pluto 9m E2 5b (3.7.05) #
Climb the groove and crack left of Spasm Chasm; some awkward moves to reach the first gear. FA: Martin Crocker, John Harwood
You May be the Face I Can't Forget is probably E5 6a - serious with an unprotected crux at the top. It is, however, superb!
Le Dernier Cri has now been climbed without pegs at E6 (Dave Ferguson solo 2002). It can also be climbed with pegs at E5 6a (not in-situ). Note: The first ascent in 1983 used pegs with pre-placed long slings, hence the grade change.
Holwell Tor
Young, Gifted, and Black 12m E4 6a (26.6.05) #
The front face of the buttress left of Dogon. Swarm up a flake onto a sloping platform. Teeter up a steep wall to creep your hands onto a sloping break (good but blind gear). Pull up and finish direct.
FA: Martin Crocker, John Harwood
Hound Tor
Never Trust a Monkey E5/6 6c 25ft #
Gain the flake on Hung Like a Baboon from the back of the roof!! A footjam and long body are very useful! Sling placed on the Hung Like a Baboon flake on the lead. FA Caedmon Mullin 5/03
Avarice E3 5c
30ft The wall left of Hydraulic Arete requires blinkers. With gear in the crack on the left and small friends on the right, make tricky moves up and onto the sloping shelf. Contine direct above to another ledgey thing. Finish direct over the final overhang. Variation: The lower crux can be made slightly easier by stretching to gain the sloping shelf from the crack on the left. FA Ben Rowe, Caedmon Mullin 5/03
Greator Rocks
A worthwhile venue with some good climbing, and much quieter than the nearby Hound Tor.
Most of the easier routes here have been climbed and claimed by various parties over the years and it is likely that first ascents below will be disputed!
The Tor is comprised of 2 main "lumps" of rock. On the South side of the Western Lump (i.e. the lump closest to Hound Tor):
Manali Groove VS 4c
35ft About 1/3 way along from the Col between the two lumps is a vegetated groove. FA Unknown
(Wrong Town), Wrong Planet (3 days late) E2 6a
20ft An extended boulder problem with serious prang potential. Near the E end of the W lump is an obvious clean arete (this is up and R of the previous route). This can be identified by a prominent large jug. Climb the arete with the tricksome manoeuvres to get onto and off the jug. FA Dave Fergusson 14.11.99 (soloed after shunting)
On the Eastern Lump:
Sexual Misadventures With Fromage Frais Severe 4a
40ft L-u-r-verly. On the W end of the S face of the E lump (i.e. the other side of the hill to Hound Tor; if stood facing the crag it's on the L end of the R lump) is juggy wall above a good landing. (This is just to the R of a holy tree about 20ft up the crag). Climb the L hand side to the top – the crux is a boulder problem start above a good landing, after which it eases off. FA Unkown
Lonely Fist of Fury E1 5b #
40ft Hmmm, nice name. Start 10ft R of Sexual… at the base of a groove. An initial tricky section leads to a grassy ledge. Finish with less difficulty up the arete above. FA Mike Pearce, H.Shandy 21.11.99 (onsight solo)
Blind London Eye E2 5c #
35ft 30ft right of Sexual Misadventures is an arete, bounding the left side of a bay (on the right side is the slab of Tools You Can Trust). Climb this! FA Mike Pearce, Dave Henderson 2000
The wall to the right of Blind London Eye provides a tricky boulder problem start and easier climbing above – Trouser Snake V3 6a/b (FA Dave Henderson Feb 2000)
Tools You Can Trust E1 5a *
A very worthwhile but essentially unprotected slab. 40ft About 20 yards R of Sexual… is an alcove. The Rhand side of this presents a fine, narrow slab with a flake at about 10ft. Climb to the flake then the slab above on surprisingly reasonable crystals and edges. Easier, though turfy territory remains above. FA Dave Fergusson 7.11.99 (onsight solo)
Dominatrix HS 4b
40ft Not easily confused with the famous Kilnsey route! To the R of Tools You Can Trust is a slabby wall with a crack on the R. Start up the crack then climb flakes Lwards to finish. FA Rob Cook, Dave "Large" Parry 21.11.99 Variation VS 4c. At 2/3 height is a gorse bush. Start as for the original then when level with this climb the slab to the L on chicken heads/crystals to finish just R of the next route.
Jugular V Diff
25ft A fine, steep route on good holds. On the eastern end of the same lump is a steep wall with two obvious slanting veins. Climb the R hand of these. FA Unknown
Blind London Eye E3
The end of of the prow on the bit of rock between Lonely Fist of Fury and Tools You Can Trust. FA Mike Pearce, Dave Henderson 2000 A direct start goes up the wall to the right at an interesting E2 6b - Trouser Snake essentially a boulder problem with funny landing! FA Dave Henderson 2000
The right hand end of the tor, when approaching from Hound Tor, is home to a few worthwhile boulder problems. On the left is a rounded top-out with a curious pocket at about english 6a/b; the the right a crack leads to a scary top-out (not sure if this has been climbed), and there's atraverse at about english 5a/5b.
Chinkwell Tor
Cobleighs Cracks HVS 5b
60` Go direct up the crack just right of the start of Widecombe wall to the wide break then tackle the short hanging (green) crack just to the left to finish on the right up the remainder of The Fair.
FA Jon Wilson and Jason Maddick 9.7.03
Lustleigh Cleave
The Nutcrackers Area
This area has seen quite a bit of bouldering development with the majority of the obvious lines being climbed, up to about V9/Font 7c.
From The Nutcrackers (i.e. where Bamboozled is) walk down the valley and to the left for about 50 yards to another outcrop. On the other side of this (i.e. the side facing the bottom of the valley) is a wall with a groove left of centre. The groove provides the line of the following route:
Lev E6 6b***
50ft The arete to the right of Bamboozled. A superb route that awaits an onsight ascent. 50ft From the base of the gully on the right make a technical and committing traverse leftwards to gain the rounded arete. The right side of this leads to a deep break at mid height. Place your first gear! The easier but still dangerous arete above leads, on it's left side, to a rounded finish. FA Dave Henderson, Steve Seale (Headpoint) 1.9.99
Sloping Beauty E4 5c #
The right side of the arete left of Split Pinnacle. FA Rob Lisney 14.11.00
Walnut Arete HVS 5a
The unprotected arete up and right of Lev is on the left hand side. FA Dave Henderson, Dave Ferguson (solo) Mid 1990's
Crystal Maze E5 6b #
An unprotected route up the the steep right hand side of the same arete. FA Rob Lisney 14.11.00
Flying Alligators E4/5 6a
20 ft Hard to find, especially now it's overgrown. Have a walk around beyond the Nutcarckers and look for a 20 ft high wall with no gear! FA Simon Young '99
From the bottom of Lev/Bamboozled walk down the valley and to the left for about 50 yards and another buttress is found. On the other side of this (i.e. the side facing the bottom of the valley) is a wall with a groove left of centre. The groove provides the line of the following route:
Kev English 6c/7a #
The route has been left without an adjectival grade as the hard bit is of boulder problem length. The seriousnesss will depend on the number of spotters and pads. 30ft Step off the boulder at the base of the groove and follow it to some quite tricky moves on slopers to gain the sloping ramp above. Finish easily above. FA Dave Henderson (solo with helmet (!) after top rope) 18 June 2002
A line on the right hand side of the buttress has been climbed at about E1 think (Dave Ferguson onsight solo 2002).
The whole area is littered with boulders, most of which have been climbed at some point. Of particular note is a superb isolated boulder 60 yards (at a guess) down below Kev - the has some excellent little problems.
Harton Chest
(referred to as Raven's Tor in the Nick White Guide)
The Pork Chop Route E7 6c ** #
This is the obvious challenge of the blank central slab. The climbing is very thin, precarious and unprotected (apart from the bouldering mats opiled up beneath!) 45ft Start to the left of the buttress. Step onto a boulder then move up the wall to a break (as for The Hog's Back). Traverse this rightwards until beneath the centre of the slab, as far right as you can go on the break (this point is directly above the start of Hung for the Slaughter). Make a committing step up onto a smear then climb crystals to gain the deep break. Traverse left along this then up the flake above. Awaits a direct finish…which will be hard! FA Simon Young '98 (solo after top roping)
Hung For the Slaughter V5 6b
A boulder problem through the overhang beneath the the main slab (Pork Chop Route) followed by a slopey traverse left along the break to gain the arete of The Hog's Back. FA Traditional!
Direct start to The Hog's Back V5 6b/c
Straight up the arete beneath the Original. So far done with a mat/cheating block to start. The tall won't need this and a super hard problem will eventually go from holds in the roof....
The Hog's Back E5 6a ***
One of the classic hard routes of the Moor. Relatively "easy" climbing but scary and dangerous. The route can be led (small Friends in the break, then large Friends and wire protects the finish) although a few of it's ascents have been soloed. Probably worth leading if going for the onsight as the top is well protected. 45ft The rounded left arete of the buttress. Start on a block at the base of the gully to the left. Step up right to the break then traverse right to gain the arete. FA Chris Nicholson, Iain Peters 30/4/86 (with abseil rope close to hand)
Pig Headed E6 6a/b * #
A dangerous route! Large Friends (#4 or prefably bigger) are useful for the deep break. 45ft Climb the slab to the left of The Hog's Back to gain a deep break. Climb directly up the wall above on phenocrysts with bad (or should that be good!) fall potential. FA Simon Young '98
Blodwyn Oldspot E5 6a *
A lovely but short line. 30ft 20 feet left of The Hog's Back is a buttress with a narrow, clean front face. This route climbs the front face (using the left arete) and is pretty gnarly, especially if for the short (in which case it's probably 6b). FA Ben Rowe (top roped first) Winter 1998. Repeated by M Crocker who upgraded it.
About 20 yards to the left of the main crag is a small bay (this is just left of the previous route). The right hand wall is home to an E1 5c up the obvious crack in the slab/wall:
Feldspar Sky E1 5c
30ft A boulder problem route that you wouldn't want to fall from. It takes the short central arete at the back of the bay (i.e R of the JaVu boulder) initially on the right then on the left to gain a large tree route. Finish up the easy corner to the right. FA Martin Crocker 11.10.98 solo
...javu E7 6c **
A thin and precarious solo with some good injury potential and a fall bigger than the route. 15ft In the centre of the bay is a large boulder with an obvious steep blank face. This route climbs the hanging slab above and left of this. From the base of the gully step right on to the slab then climb direct to the top. FA Dave Henderson 11.10.98 (solo after Top Roping) Note: the route has also been repeated with a side belayer and mat, probably reducing the grade..
About 50 yards down the valley-side from JaVu is a short buttress with a narrow slabby front face, an arete and steeper left wall:
Big Bad Wolf E6 6b **
25ft The unprotected left arete is climbed on it's left side. A stack of mats may the sting out of it. FA Simon Young solo after inspection '99 (Originally given E5 6a but a couple of the repeat ascentionists though E6 to be closer the mark)
Rumbles in the Jungles E4/5 5c/6a
30ft The right hand side of the Big Bad Wolf arete provides a technically easier but more dangerous route. FA James "Tog" Tippins, Jason Maddick (both solo after top rope) June 2002
The following route is located on a small buttress further up the valley from javu. Basically head down hill just as you get onto the open heath.
Boyz in the wood E2 5b #
20` The obvious arete stepping in from the left. A good cam can be placed from the ground although falling from the last couple moves may result in a boulder scraping. FA James Tippins and Jason Maddick 01/06/2002.
The arete to the left of the central corner (left of Boyz in the Wood) is a really good highball problem - either about V4 6a/b with a start stepping in from the boulder on the right or V5 6b with the direct start (for the tall!). There's also a good but scary 5bish (english) rockover problem onto the arete a bit higher to the right.
Westcott Rocks
NOTE: Access problems have been encountered here
Nick White's "soloed with hanging rope" Wild Palms E5 has had a second ascent (soloed) by Dave Henderson (after cleaning and inspection on a shunt). The grade is confirmed at solid E5 without the hanging rope.
Palm Doff E4 6b #
The wall to the left of Wild Palms. Technially a bit harder than Wild Palms but with a more friendly landing zone. FA Dave Henderson (solo after abseil) Summer 2000.
Luckey Tor
Tough Luckey E3 6a ** #
Well protected and fun. Follow Eagle's Nest until below the upper overhang. A steep and fingery traverse leads out left to a fine position on the front of the undercut buttress. Climb strenuously direct up breaks to the top. FA Andy Grieve, Richard Hudson 9/08/2007
Great Mis Tor
Mismatch Hard Severe 4b
20ft 25yrds left of Misunderstood is a short cleanish wall, climb this direct to a grassy finish. FA Jason (The Ghost) Maddick and, James (Tog) Tippins
Between the route Misunderstood and the outcrop containing Mister stickweed is another outcrop, the following two routes climb the far face of this, above a small pool:
Misdemeanor V Diff 4a
25ft The crack line trending left near the top. FA Jason (The Ghost) Maddick and, James (Tog) Tippins Summer 2001
Mis You Moor Very Severe 4c
25ft The line directly above the pool via a hard starting move, easily escapable. Routes climbed summer 2001 First ascents Jason (The Ghost) Maddick and, James (Tog) Tippins Summer 2001
Swell Tor Quarry
The Nick of Time E5/6 6b **, Simon Young's (soloed after top rope inspection) route in Swell Tor Quarry, has had a couple of repeats. Initially graded E6 6c, the second ascentionist, Simon Blagdon (soloed following top roping), found a more amenable sequence and reckoned E5 6a (Plymouth grading!). A third ascent (soloed after abseil inspection) by Dave Henderson has suggested a technical grade of 6b, with the adjectival grade being bottom end E6/ top end E5 (/soft touch E4/hard E1!). We'll wait and see what happens when someone from out of the area makes an onsight repeat to find out what it really is!
* The obvious slab on the right as you walk into the quarry. Identified by a bore-hole strike and recorded as a jest as April Fool in Nick White's South Devon and Dartmoor guide.
King's Tor
Stonechat Wall E2 5b #
30ft A delightful little route found on the steep wall facing Vixen Tor. Climb the wall with a steep start and slopey top out! FA Dave Henderson 2000
The arete to the right provides another nice little route at about HS, and the obvious corner to the left is a fine Diff.
Foggintor Quarry
Bank Holiday Hooker E2 6a #
40ft Opposite Saturday Night Finger, on the E side of the quarry is a particularly prominent promontory of rock. Start an obvious orange scar and climb the ramp on the bottom left side of the wall, staying just right of the arete. This is the free version the above. Climb the wall R of the arete to a borehole and essential RP's above. Traverse R (crux) then finish up the finger crack above. FA Martin Perry '98
Greater (or is it Middle!) Staple Tor
A remote-feeling venue with a smattering of bouldering and short routes.
There is some confusion over tors in this area as Little Staple Tor is often not noticed - it's just a small pile of rocks.
In Charge of Small children E2 6a
A micro route (or highball if you're very brave!) on the prominant tower capped with an amazing curved nose / birds bill feature. FA Nick Hancock, Rik Meek 1995
Gary Willis on In Charge of Small Children
Leedon Tor
Dartmoor Roamer HVS 5b
25ft Takes the wall and bulge around the arete to the left of Amid Devionian Alps. FA Jason Maddick Solo.
Amid Devonia Alps VS
20ft Climbs the face overlooking the road. FA Paul Twomey (solo) 1996.
Leather Tor
Scottish Highlands HVS 5a * #
40ft From the start of Dies Irae climb up leftwards to gain the start of the obvious diagonal overlap. Follow this into the main central groove. Climb the groove until a diagonal break leads leftwards across the top of the slab to an easy finish. FA Andy Grieve, Richard Hudson 4.10.03
Give Me Five E3 5c ** #
Good gear, good rock, good route! 35ft Start from a boulder below the steep finger crack just left of the clean central slab. Difficult moves lead to a small sloping ledge and awkward rest. Climb the crack then rock right up onto the slab. Follow the continuation rounded flakes to the top. FA Andy Grieve (unseconded) 4.10.03
Leaving Town E3/4 6a ** #
A bold line through the steep slab and overhang to the L of Dies Irae – take some RP's and a small cam (#0). 30ft Start on the L side of the slab, beneath a bulging arete. Boulder up to the overhang (Good Wire/Cam) using a crack on the L for protection. Rock over onto the steep slab above using a side-pull then climb the centre of this to the top. FA Joey Getler, Simon Newman and Rob Cook 13.9.98
Heel Today, Gone Tomorrow E4 6a/b #
A direct line through the overlap in the centre of the slab L of Dies Irae. 35ft Start up the middle of the slab. Hard and awkward moves lead through the overlap onto the slab above. Climb the centre of this to the top. FA Mike Pearce (unseconded) 17.10.99 (led after top rope practice)
Irish Man's Wall
GR 614 918 Irish Man's Wall is a man-made wall, marked on the map. The adjacent crag has taken on the same name. As well as the routes (detailed below) there is also a selection of boulder problems in the area; these tend to be bit lichenous but you if you fancy some quiet climbing away from the beaten track this venue is well worth a look. This venue can easily be combined with trip to the nearby West Mill Tor SX587910 (itself home to a small number of problems and a fine girdle traverse at severe).
Recorded development was instigated by brothers Colin and Eric Milton in 1996 (it is likely the easier lines had been climbed before but left unrecorded) and since then the crags have been visited by the Mike Pearce/ Rob Cook/ Chris Kay/ Gary Crockford team (some of whom could do with washing thier mouths out with soapy water!) and later by Jason "the ghost" Maddick and James "Tog" Tippins.
Approach: If driving on the A30 from Exeter take the first turn off for Okehampton. At the end of the slip road turn L and follow signs for Belstone. Park either in the car park on the L as you enter the village (the more local friendly option), or carry on through to a dead end and potential for parking on the R side of the road.
From here follow the track up onto the Moor then continue up the hill to Belstone Tor. Continue on beyond here until a man made wall (Irishman's Wall) can be seen on your right - the "crag" is found down on the right and is actually 2 crags separated by a 50 yards gap.
Alternatively, for those averse to a little walk, the closest parking can be found be by driving through Okehampton army camp, onto the army roads to Culver Steps (on the East Okement River). Park at top of the track leading down to the river (and Culver Steps) then walk down this, over the river and onto the crags up to the right. Check on the map, and make sure they're not firing!
The routes are all about 20-25ft high.
Starting on the left crag:
Surform HVS 5b
The diagonal crack at the left hand end of the Tor. FA Eric Milton, Colin Milton 12.10.96
Bank Holiday Bimble VS 5a
Climb the overhanging cracks to the right of Surform to gain an undercut fingerpocket. A bold section then leads to layback flakes. FA Chris Kay, Rob Cook Summer 1997
Ann, Jim and Mary Severe 4a
The flake line on the left of the front wall with a hard start. FA Colin Milton, Eric Milton 12.10.96
Un-named Mod
The central corner. FA unknown
Meader's Mutterings HS 4b
The centre of the right-hand slab. FA Colin Milton, Eric Milton 12.10.96
Caffreys Severe 4b
20ft To the right of Meaders mutterings around the arete is a short vertical wall, climb this direct. FA Jason (The Ghost) Maddick and, James (Tog) Tippins summer 2001
Between the Surform buttress and the next buttress (the Non-Metallic buttress) is a small bay. The following two routes are found here:
Murphys Very Difficult 4a
20ft The groove line starting on a brilliant jug. FA Jason (The Ghost) Maddick and, James (Tog) Tippins Summer 2001
Guiness Very Difficult 4b
20ft The line of stuck on jugs just to the left of Murphys. These routes were climbed summer 2001, First ascents Jason (The Ghost) Maddick, and James (Tog) Tippins. Summer 2001
The remaining routes are found on a separate buttress about 50 yards to the right:
White Spider Directissmma E2 5c Climb directly up the steep wall and overhang to the left of Non-Metallic Silver.
Non-Metallic Silver E2 5c The best route in the vicinity tackles the overlap on the left-hand side of the crag. Start beneath the middle of the overlap where it bulges slightly. Thin moves lead to vital gear beneath the overlap followed by bold moves to a good hold on the left. Step right to finish. FA Colin Milton, Eric Milton 12.10.96
Leprechaun E2 5c*
25ft The wall to the right of Non-metallic silver. Taking a direct line up and over the overlap via a hard starting move and tricky finish. FA Jason (The Ghost) Maddick and, James (Tog) Tippins Summer 2001
Not Very Very Difficult
The line just R of the R arete. FA Colin Milton (solo) 12.10.96
Great Links Tor
Martin Crocker has paid the crag a visit, adding some news lines and commenting: "Repeated all existing routes while here (two visits) except Antsy which was a sheet of moss. Link It is Tenuous Link with its Direct Finish, by the look of it."
Strangelobe E1 5b
20ft Start under a narrow buttress formed by the two easy cracks right of The Missing Link overhangs. Tackle the buttress on good breaks; then - using the strange lobe out right – move up past a sloping ledge to the top. Good gear. FA: Martin Crocker, solo (7.4.07)
Close to Tenuous 8m E1 5b
25ft Climb the left edge of the curved recess at the base of the crag, continuing direct past breaks to the easy summit slab. Good cam protection.
FA: Martin Crocker, solo (7.4.07)
Miss Tin Lin E4 6a #
25ft Another Missing Link with similarly awkward-to-place gear. Start under the right-hand end of the jammed flake in the bulges, a metre right of The Missing Link. Climb onto the right-hand end of the flake and finish over the top bulge slightly rightwards on improving holds. FA: Martin Crocker, John Harwood 16.4.06
On the South face of the main (tallest block) there is a smooth wall right of the trig. point, the next route climbs this
The Plague E1 5a *
30ft Start below the highest point of the wall below a small but obvious flake at half height. This is reached easily and gives gear (very small friends). An unnerving stretch reaches the largest break (large friends only) and a pumpy finish FA Dan Arkle 4/9/04 onsight
Even the Kitchen Sink E4 5c * #
25ft One of the best routes on the crag, but without any gear (unless you stretch left to place wires on The Plague). Starting 2m left of the chimney (Bogey), climb straight up a blunt rib to the wide sloping break and a straightforward finish. It would be wise to check beforehand that the small fingerholds leading to the break are clear of moss. FA. Martin Crocker; solo after top roping 7.4.07
Antsy E1 5b
25ft Start 10 right of The Plague, boulder up rightwards to a sloping shelf and follow easily to the top. No protection and a poor route FA Dan Arkle 4/9/04 Solo after abseil inspection
Bogey Diff
20ft The grotty chimney crack FA Andy Wylie and Dan Arkle 4/9/04 Both soloed
The four existing climbs are on the steep wall to the right. The NE face of the same block gives four new routes, the first two start in a trench behind a block
Acrobat HS 4b
20ft Start below the left side of the wall. A tricky first move leads to easier pleasant climbing above FA Dan Arkle and Andy Wylie 4/9/04 onsight
Tight Rope E1 5a
30ft Step off the RH side of the block behind to reach the only positive hold of the route-its small so look carefully. Precarious balancey climbing leads straight up FA Dan Arkle 4/9/04 onsight
The Weakest Link E2 5c
35ft Start 10' right of the trench below a small sidepull 10' up. Boulder up to this, move up, step left before finishing up a tricky shallow drainage groove FA Dan Arkle 27/9/03 onsight
Link it E3 5c
35ft Start below a RW facing scoop at half height. Hard moves and a mantel lead to the scoop. The final bulge taken direct is desperate FA Dan Arkle 4/9/04 onsight
50' East is a shorter wall N facing wall. At its RH arete there is an undercut flake
I Lie When I Say... E2 6a
20ft Gain the right-hand end of the sloping ledge under the face left of You'll Always Be...... Place good wires; then make a quirky move to the higher break. Finish easily. Safe enough – with careful belaying. FA: Martin Crocker, with Soloist (7.4.07)
You'll always be E1 5b *
20ft Start using the flake and finish direct FA Dan Arkle 27/9/03
Special to me VD
20ft The crack to the right is easy after the first move FA Alys Mendus 27/9/03
On the other side of this block are some good easy boulder problems. 'Baby, please stay'**. 5a Goes up past the detached loose block
Fur Tor
The following route, the most isolated in the West Country, is found on the large boulder approx 200m west of the main lump is an obvious high slab/wall with an undercut start.
Splendid Isolation E3 5b
Climb the slab, gained from the right. A direct start is possible at V4/6bish. FA James Clapham 200?(solo) repeated by Jason Maddick, grade confirmed.
Dewerstone
Slapping Flapping Faffing Father E1 5a
Up the hill and right from Bruised Heels is a quarry. On the right-hand of the right wall, (just left of the arete) is a rusty coloured wall with a tree at the top. Climb this, with gear low down, until a reach right gains a hold on the arete. Finish up this and through the tree above. FA Lance Colmer 24.2.2001
The following route is found in the Window Pane area (i.e. the butress up to the left of the approach path before you get to Agag's Slab).
Moss Wall E6 6b/c #
A hard route up the narrow mossy wall between Window Pane and Tower Crack. At a guess probably between E6 depending on how many mats and spotters you have although could be harder without mats. 30 ft. The mossy wall between Window Pane and Tower Crack. Either start up the crack of Windowpane and climb straight up where the Windowpane goes left or start further right on some nasty sharp holds, to join up with the other line. FA Nic Dill May 2006 Soloed with 1 mat (more would have been nicer), after top rope practice.
The following line "supercedes and dramatically improves Globe and Laurel making it a continuous line without deviations all over the place."
Marine E2 5c #
120ft Start in the shallow cave left of Climbers' Club Ordinary and climb direct to the roof above the traverse of that route. Climb over this direct and continue up the banana shaped cracks above to a step right. Instead of going right as for the parent route climb thin cracks steeply up and left until it is possible to step right and finish at the last belay of Route B. Walk off. This will probably need a little cleaning but is in fact a very good route. The lower section over the roof had been done before but above that it was unclimbed when we did it. FA P O'Sullivan, Ken Hosie September 1986
Ultimate Eliminate Direct E3 5c ** 165ft #
An improved direct version of the original route to give a sustained climb of great character with an airy climax. It has 4 metres of new climbing on the arete.
1) 5c. 100ft Climb Climbers' Club Super Direct and step left onto the tree on Climbers' Club Direct. Make tenuous moves up the arete ending at good holds and a small wire on the microgranite band. Continue to belay on the huge bollard.
2) 5b. 65ft Climb the arete and wall right of the chimney of CCD. Continue up the face with a reachy move onto the headwall in a magnificent position.
FA Pete Saunders 06/Jun/2011 "I shared leads with Nick hancock in 1986 and he joined the arete at half height from the right. Unfortunately the description in Nick White's guide got abbreviated and doesn't make this clear. My new version makes it one of the better routes at the Dewerstone with a surprising amount of well positioned independent climbing. Cleaned and practiced on a shunt before the FA."
Thanks to Boreal for supporting the site! Copyright
2000-2017 © ...javu/Dave Henderson javu
info
![]()
This file last modified
(none)